If you’re curious about one of the edgiest cartilage piercings around, you’ve probably come across the snug piercing. Known for its bold placement and unique look, this piercing has become a favorite among those who want something eye-catching yet stylish. But before you decide to get one, it’s important to understand everything about the process, pain level, healing, and long-term care. This guide covers it all so you can make an informed choice.
What Is a Snug Piercing?
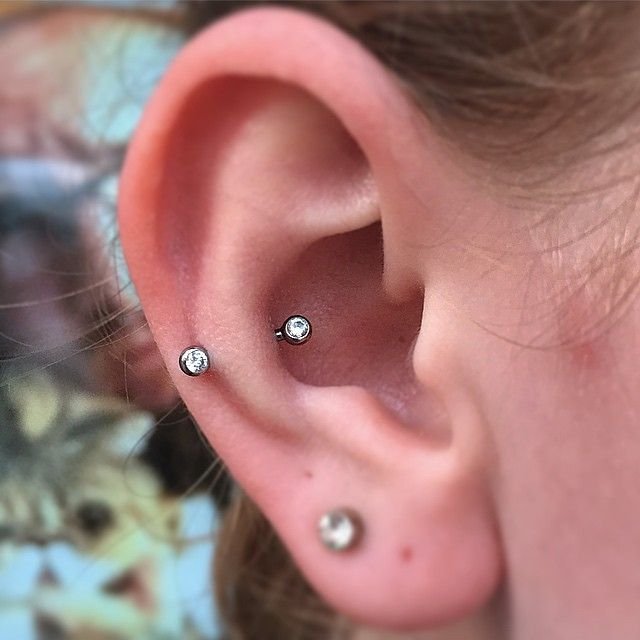
A snug piercing is a type of ear cartilage piercing located along the inner ridge of the ear, between the outer rim (helix) and the antihelix. Unlike more common piercings such as the lobe or helix, this one sits deeper and is instantly recognizable for its unusual position.
What makes it stand out is how it follows the natural curve of the ear’s inner ridge. Because this area is thicker than other cartilage spots, it requires precision from a professional piercer. Not everyone has the right ear anatomy for it, which is why a consultation is essential before going ahead.
The Appeal of Snug Piercings
Why do people choose this piercing? For many, it’s the combination of rarity and boldness. While lobes, helix, and tragus piercings are common, the snug is far less frequently seen, which makes it a statement piece.
Reasons people love it include:
- The special style: Quickly distinguishes you from others.
- Versatility: Can be styled with subtle jewelry or bold designs.
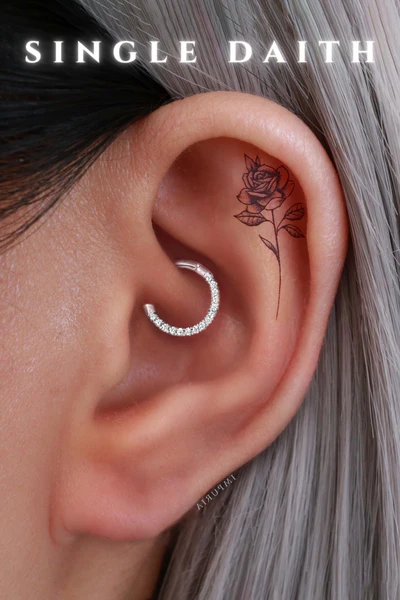
- Complements ear stacks: Looks great when paired with helix, rook, or daith piercings.
- Celebrity influence: Stars in fashion and music have sported this look, sparking interest.
A snug piercing is a way to showcase individuality. It’s the piercing equivalent of wearing a custom-tailored outfit—recognizable, polished, and personal.
Pain Level – Does a Snug Piercing Hurt?
Let’s be real: this piercing has a reputation for being on the more painful side. Since it goes through a thicker part of the ear cartilage, most people report higher discomfort than with a standard helix.
Here’s a quick comparison:
| Piercing Type | Average Pain Level (1–10) | Notes |
| Earlobe | 2/10 | Quick, minimal pain |
| Helix | 5/10 | Slight pinch, moderate soreness |
| Tragus | 6/10 | More pressure than pain |
| Rook | 7/10 | Deep tissue, noticeable pressure |
| Snug | 8–9/10 | Thicker cartilage, longer healing |
Factors that affect pain include:
- Individual pain tolerance
- Skill of the piercer
- Jewelry size and type
- Swelling during the first few weeks
One piercing enthusiast described it this way: “The actual piercing was sharp and intense, but it was over quickly. The tenderness afterward lasted longer than with my helix.”
Healing Process for Snug Piercings
Healing a snug piercing is a marathon, not a sprint. On average, it takes six to twelve months to fully heal, though some people experience tenderness for longer.
Healing stages:
- Week 1–4: Swelling, redness, and soreness are normal.
- Month 2–4: The piercing starts to stabilize, but bumps may form if irritated.
- Month 5–12: Gradual improvement; pain and swelling fade, tissue hardens around the jewelry.
What’s normal:
- Mild swelling and redness
- Tenderness when touched or slept on
- Clear or white discharge (not pus)
Warning signs of infection:
- Yellow or green pus
- Severe swelling and heat
- Persistent throbbing pain
If any of these symptoms appear, consulting a piercer or doctor is essential.
Aftercare Instructions for Snug Piercing
Correct aftercare plays a crucial role in determining the outcome of the healing process. Here’s a simple routine:
Daily Cleaning Routine:
- Use a sterile saline spray 2–3 times per day.
- Avoid harsh products like alcohol or hydrogen peroxide.
- Gently dry them using clean paper towels; cloth towels should never be used.
Do’s and Don’ts:
Do:
- Sleep on the opposite side to avoid pressure.
- Keep hair and headphones away from the piercing.
- Stick to your piercer’s recommended jewelry during healing.
Don’t:
- Twist or fiddle with the jewelry.
- Swim in pools, lakes, or oceans during the first months.
- Apply ointments unless instructed by a professional.
Quick Aftercare Checklist:
- Clean twice daily with saline
- Avoid touching with unwashed hands
- Sleep carefully to reduce irritation
- Monitor for bumps or keloids
Jewelry Options for Snug Piercings
Choosing the right jewelry not only improves your appearance but also helps avoid problems.
Best types of jewelry:
- Curved barbells: The most popular choice, sits comfortably in the ridge.
- Hoops: Stylish but can put pressure on healing tissue.
- Micro curved barbells: Great for smaller ear anatomy.
Recommended materials:
- Titanium: Hypoallergenic and lightweight.
- Surgical steel: Durable and affordable.
- 14k or 18k gold: Luxurious but more expensive.
Styling ideas:
- Combine coordinating rook and helix earrings for a stylish ear look.
- Mix metals for a modern look.
- Keep it simple during healing, then switch to decorative designs.
Cost of a Snug Piercing
Prices vary depending on where you are, but expect to pay for both the procedure and the jewelry.
Average Price Ranges:
| Country | Cost Range |
| United States | $50–$90 (plus jewelry) |
| United Kingdom | £40–£80 |
| Europe | €45–€90 |
What affects cost:
- Piercer’s experience and reputation
- Jewelry material and quality
- Studio location (big cities usually cost more)
Tip: Never choose a piercer based on price alone. A safe, hygienic environment is worth every penny.
Risks and Complications
Like all piercings, the snug carries potential risks. Common issues include:
- Migration or rejection: Jewelry moves out of the cartilage.
- Hypertrophic scarring: Raised bumps around the piercing.
- Infection: Caused by poor hygiene or improper aftercare.
- Improper placement: Can lead to uneven healing or rejection.
How to avoid problems:
- Choose a reputable piercer with cartilage experience.
- Follow aftercare instructions consistently.
- Don’t change jewelry too soon.
Snug Piercing vs. Similar Cartilage Piercings
Confusing the snug with other cartilage piercings is common. Here’s a quick breakdown:
| Piercing | Placement | Pain Level | Healing Time |
| Snug | Inner ridge (antihelix) | 8–9/10 | 6–12 months |
| Rook | Fold above the snug | 7/10 | 6–12 months |
| Helix | Outer ear rim | 5/10 | 3–6 months |
While they’re all striking, the snug is considered the boldest because of its placement and difficulty.
Who Can and Can’t Get a Snug Piercing?
Not everyone is a candidate for this piercing. The ridge must be deep enough to hold jewelry securely.
You can likely get it if:
- Your antihelix is prominent enough.
- You have thicker ear cartilage.
You may not be suitable if:
- Your ear ridge is too shallow.
- You have previous cartilage issues or scarring.
In cases where anatomy doesn’t allow for it, a piercer might suggest alternatives like the rook or conch piercing.
Choosing the Right Piercer
This piercing requires precision, so selecting the right professional matters.
Qualities to look for:
- Licensed and certified piercer
- Experience specifically with cartilage piercings
- Clean, sterile studio with visible hygiene practices
Questions to ask before booking:
- How many snug piercings have you done?
- What jewelry do you recommend for initial healing?
- What’s included in the aftercare process?
FAQs About Snug Piercings
Q: If I take out the jewelry, will it close up?
Yes, cartilage piercings close faster than you’d expect. Even healed ones can shrink within hours or days.
Q: When can I change my jewelry?
Wait at least 6 months, but ideally a year, before swapping jewelry.
Q: Can I sleep on it?
Not at first.Applying pressure to the piercing may delay its healing process and lead to discomfort.
Q: Do snug piercings leave scars?
Mild scarring is possible, especially if removed early or improperly cared for.
Final Thoughts – Is a Snug Piercing Right for You?
This piercing isn’t suitable for those who are easily scared. It’s stylish, rare, and bold, but it also demands patience and care during healing. If your anatomy allows it and you’re ready for the commitment, a snug piercing can be one of the most rewarding choices for ear art.
The key is finding a skilled piercer, following aftercare religiously, and being realistic about the healing process. If you’re willing to put in the time, you’ll end up with one of the most striking piercings possible.


Leave a Reply